Photo One Integration
Setup in Digital Studio LP
- Open Digital Studio LP and open a project.
- Under Setup on the Main Menu, select Preferences.
- On the Preferences screen make sure you:
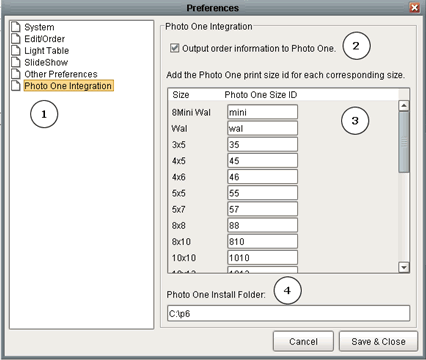
- Click on the Photo One Integration tab on the left.
- Make sure to check the Output order information to Photo One check box.
- Enter in your photo one product ID's for each of the print sizes listed.
- Type in the path to the folder that Photo One is installed into. The default folder should be C:\p6
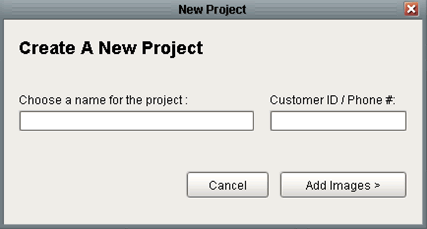
- When you create a new project it will ask you to enter in the customer ID / Phone number. This should be the phone number that you entered into Photo One. PLEASE NOTE: This is the identifier that is used to correlate orders between Digital Studio LP and Photo One.
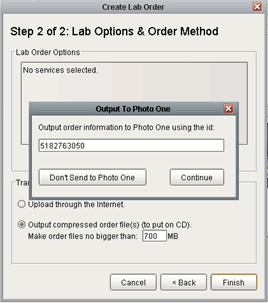
- When creating a lab order, the last step will ask you if you would like to send the order information to Photo One. On this screen you also have the option to modify the Customer ID that will be used to correlate this order to a customer in Photo One.
Setup in Photo One
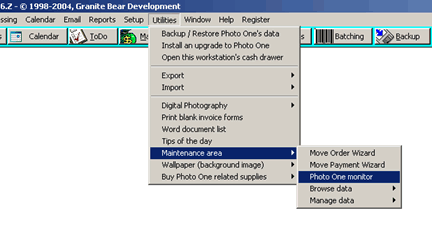
- In Photo One you must have the Photo One monitor running to detect orders from Digital Studio LP. To do this select Utilities -> Maintenance area -> Photo One Monitor:
NOTES:
When an order comes in from an online event hosted through LabPrints, the order information and customer shipping information is downloaded and passed to Photo One. It is highly recommended that you create a separate order in Digital Studio LP for every online order you download. This will keep the customers billing and shipping information separate from other online orders.