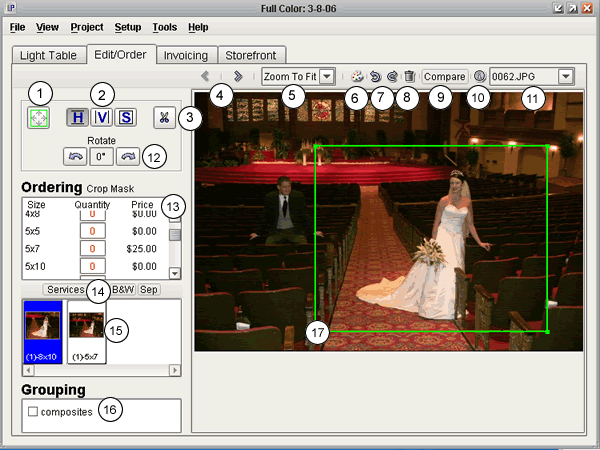
- Navigates through your images. By default, it will navigate through all images in the current group, but can be set to cycle through all images in the project
- Zooms in, out, or fits the current image to the size of the screen.
- Opens the image in an external editor.
- Rotates the image clockwise or counterclockwise.
- Puts the image in the trash group.
- Display the current image in the Compare Images screen.
- Displays information about the original (high-resolution) image file.
- Jump to any of the images in the current project.
- Resize the green crop box to the entire height and width of the image.
- Choose between a vertical, horizontal, and square crop mask.
- This tool allows you to view the exact crop of the image, but covering up any part of the image that is outside the crop box.
- Rotate the crop mask left of right.
- Size, quantity, and prices for the current image.
- Order lab services for this image.
- Preview thumbnails for each crop that has been ordered.
- Quick group classification of your images
- The green rectangle represents the current Crop Mask, the area that will get printed for ordered prints.