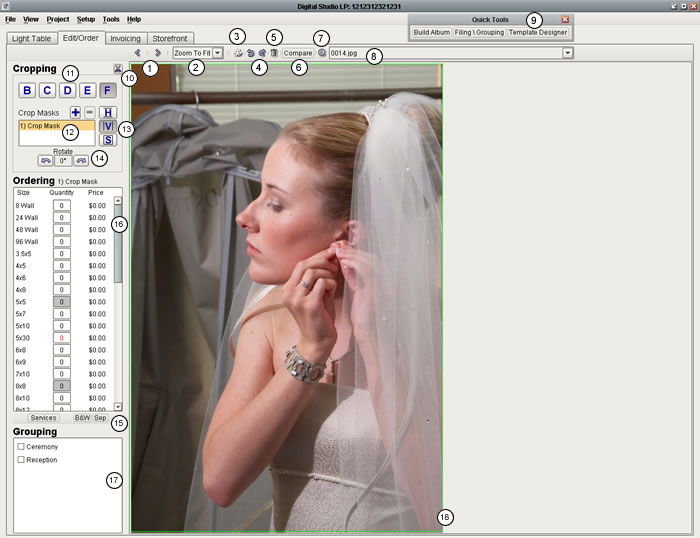
- Navigates through your images. By default, it will navigate through all images in the current group, but can be set to cycle through all images in the project
- Zooms in, out, or fits the current image to the size of the screen.
- Opens the image in an external editor.
- Rotates the image clockwise or counterclockwise.
- Puts the image in the trash group.
- Display the current image in the Compare Images screen.
- Displays information about the original (high-resolution) image file.
- Jump to any of the images in the current project.
- Quickly open the Album Builder and/or Filing & Grouping.
- Mask the image to show what it will look like when it gets cropped at the lab.
- Size buttons that allow you to quickly set the Crop Mask to a percentage size of the image.
- A list of all of the Crop Masks for this image.
- Crop Mask type buttons that allow you to toggle between Horizontal, Vertical, and Square crops.
- Rotate the Crop Mask to the left or right (one degree at a time).
- Order lab services for this image.
- Size, quantity, and prices for the current image.
- Quick classification of your images.
- The green rectangle represents the current Crop Mask, the area that will get printed for ordered prints.